Character Head Drawing Bottom View
In this tutorial, I will show you the technique that I use to represent mouths and lips. I will explain the simplest structures to understand how to draw different shapes and expressions. And finally, I will integrate them into a color illustration.
Note that, in addition to this method, there are many other ways to learn how to draw mouths and lips, but I will explain the method that I have considered to be the most appropriate and easy to understand.
To make the following illustrations, I have used Clip Studio Paint EX, but any other drawing software can be used.
1. How to draw a mouth: Simplified structures
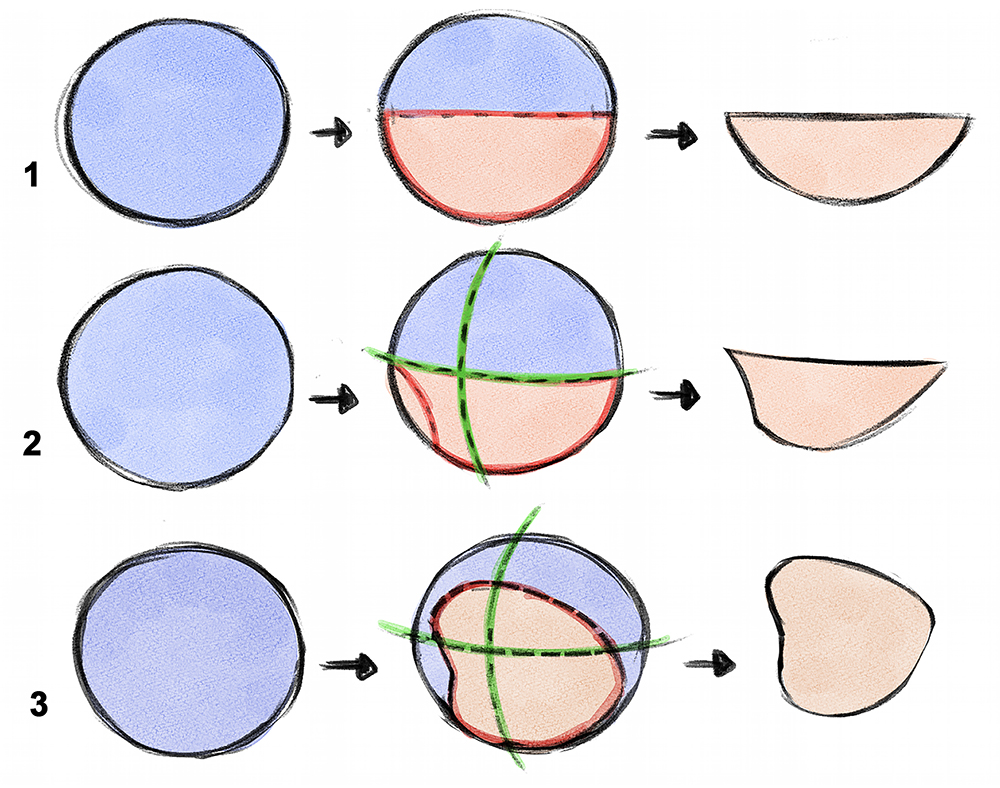
First, let us analyze the mouth without the lips, to better analyze its structure.
To understand the mouth, think about a sphere. The (open) mouth would be half of it. This is a simple exercise that shows that the mouth is not exclusively a straight line when it is closed and a crescent when it is open, but that it has its own volume.
In this example, you can see a mouth in its simplest form without perspective (image 1) and how it can be imagined with ¾ perspective (images 2 and 3).
2. How to draw the mouth: Key elements
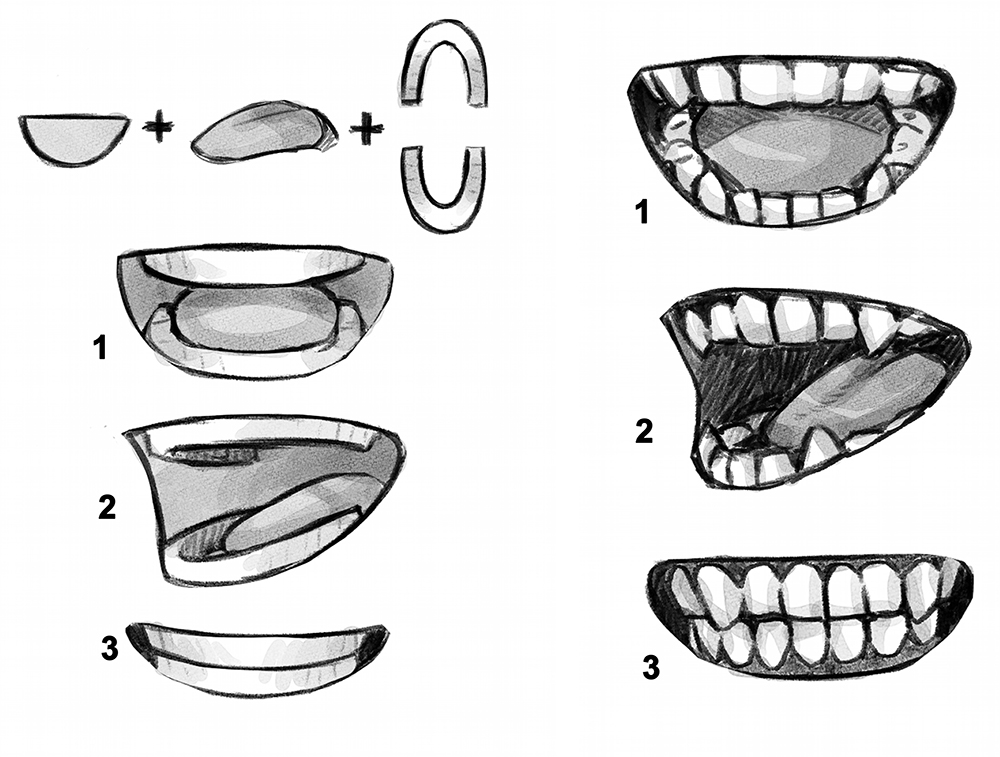
Now that we recognize that the mouth has volume, we must also take into account that it also has depth. It is a cavity, and thus it contains important elements that will help us draw the mouth: the teeth, the tongue, and even the gums. You can even go further into other elements such as the uvula, the palate, all the different teeth, the tonsils, etc. But let us focus on those three basic features.
On the left is an example of how the outlined elements that make up the mouth can be represented and on the right, is a more detailed interpretation of them.
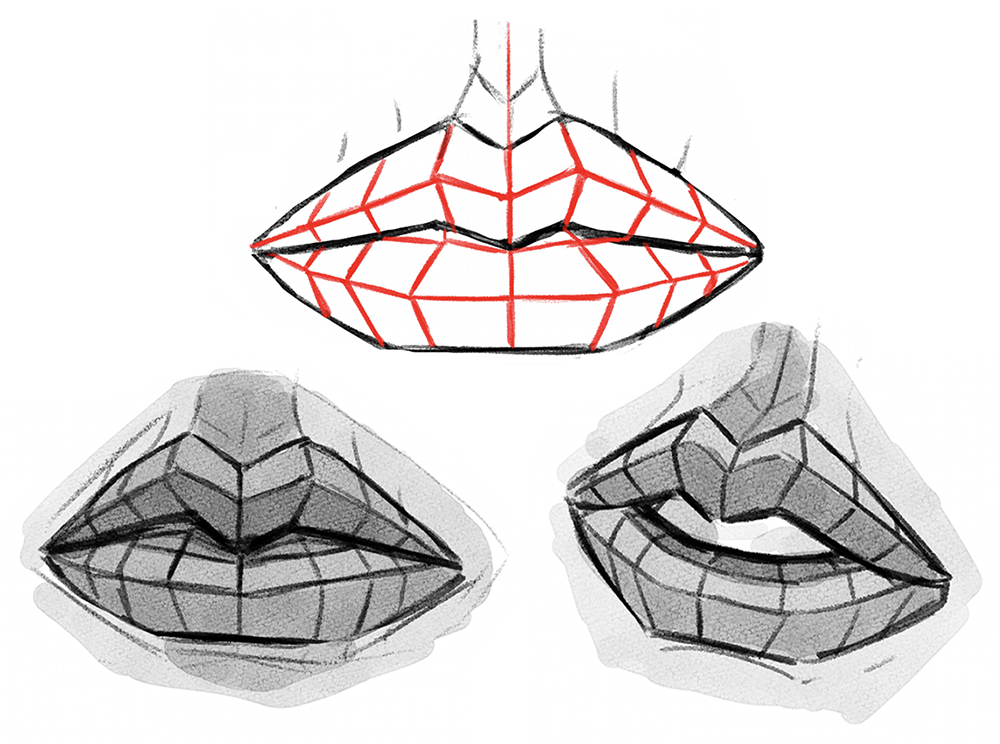
3. How to draw lips: Simplified structures
Lips are essential elements that connect to the mouth. To understand them, let's try to represent them separately from the mouth and in their simplest forms.
In this image, we can see how to draw the lips step by step using rounded, curved, and elongated structures, starting from a straight line and without perspective. Also, keep in mind that the thickness, width, and length of the lips will depend a lot on the type of character we want to design.
If it is difficult for us to imagine the mouth with rounded and curved structures, it is advisable to start by drawing flattened areas (as if it were low poly!).
In this way, we can better grasp which areas have the most volume.
4. Drawing a draft
Key structures
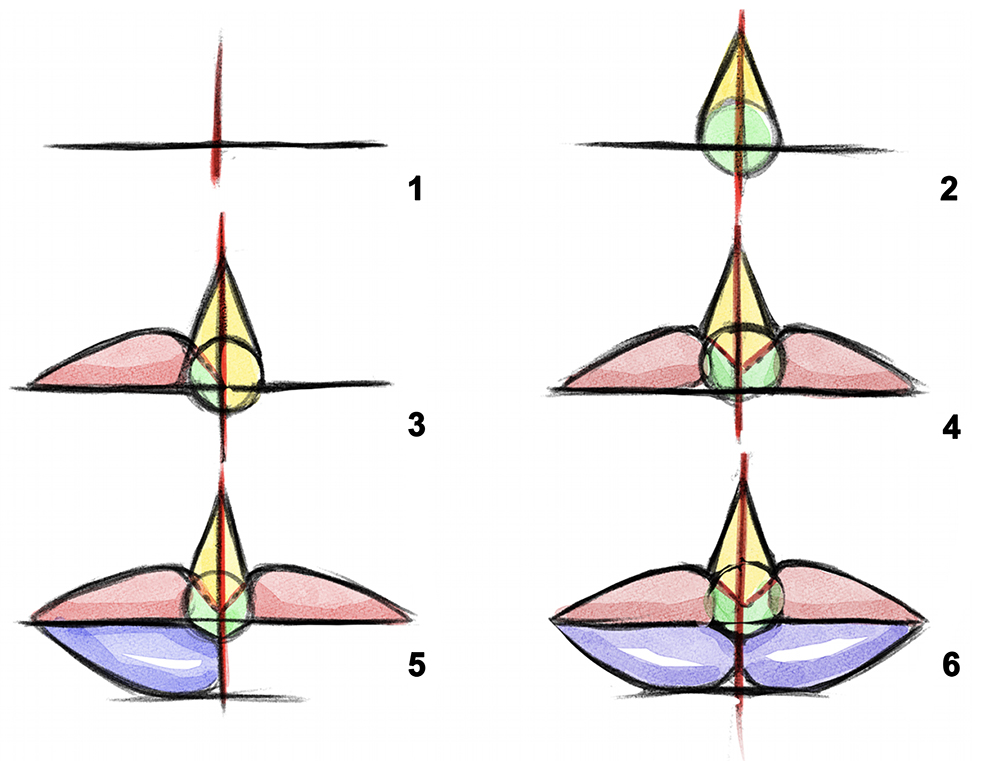
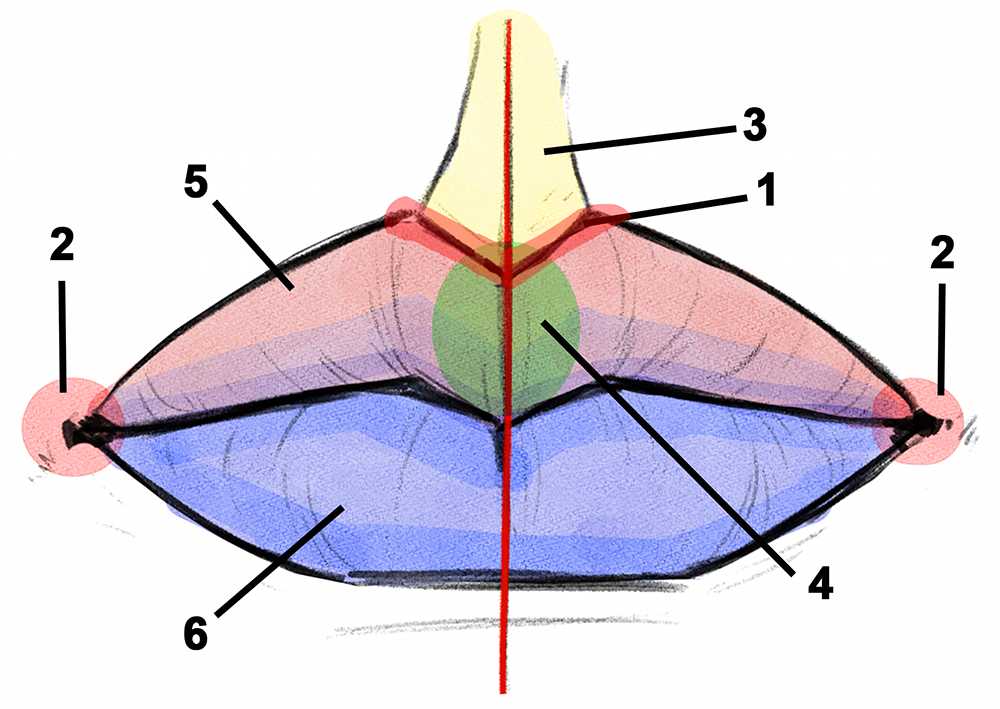
As we have seen in the mouth, there are also key elements on the lips that will help us better understand and design them.
We must study the Cupid's bow (1), the commissures (or where the top and bottom lips connect) (2), the philtrum (the skin connecting the nose to the mouth) (3), the central tubercles (The bottom of the lip under the cupid's bow) (4), the upper lip (5), and the lower lip (6).
Varying these elements produces several lip designs.
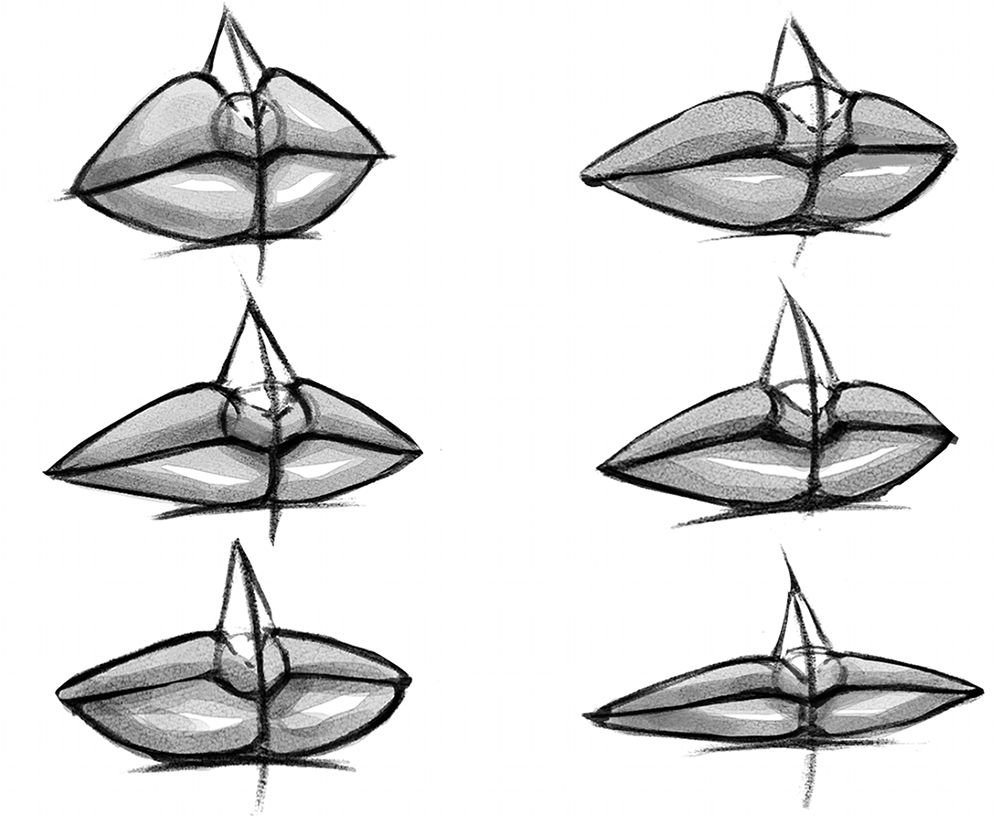
5. Different shapes of mouths and lips
Making different lips and mouths is a matter of trying variations in the thickness of the lower or upper lips. We can mark the Cupid's bow, widen or narrow the mouth, etc. It is interesting to keep trying and see what works best for our character.
A small mouth is usually related to a small or shy character, and a large mouth is for more expressive characters. Thin lips may define a masculine character and thick lips a feminine one, although there can always be exceptions.
Check some examples of lips and mouth variations below.
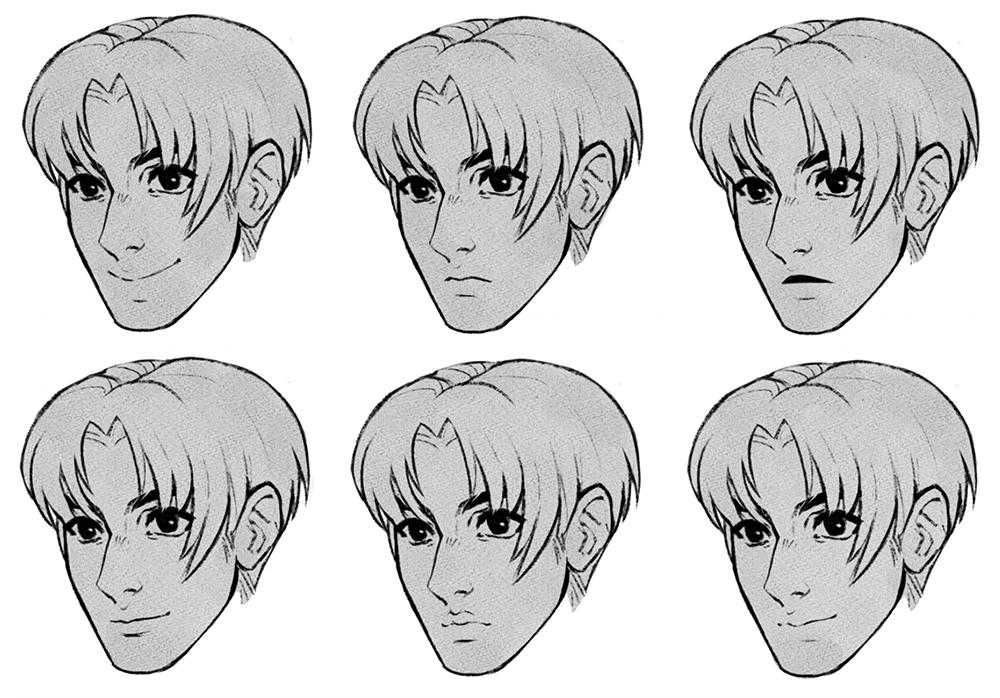
6. Different shapes of lips and mouths on the same face
Knowing that we can vary the size of the mouth and lips, it is interesting to try different modifications on the same character, to see which one fits better.

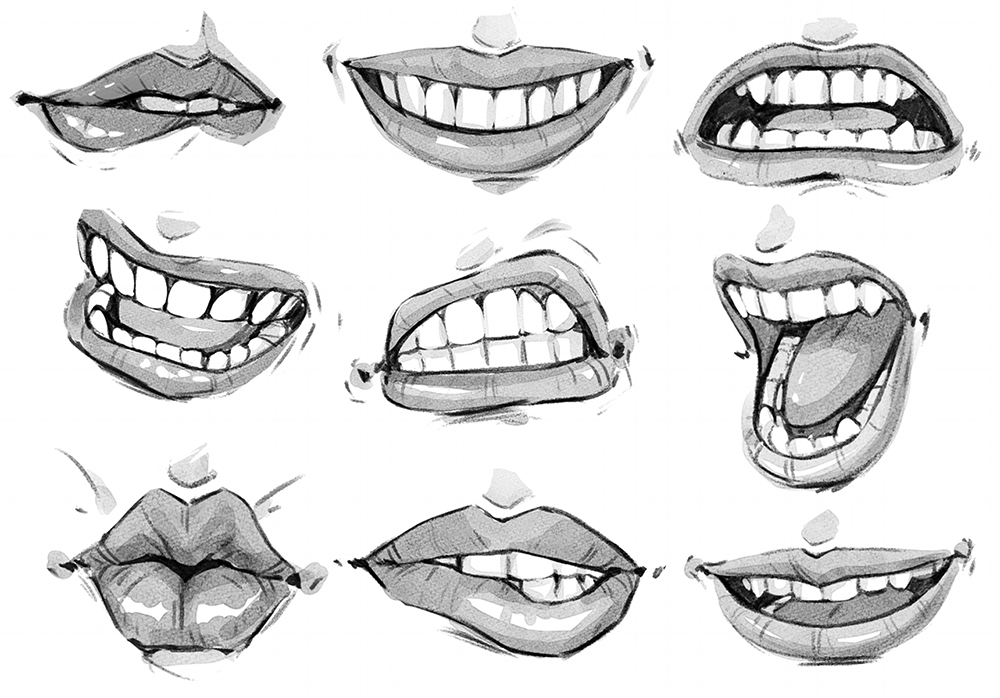
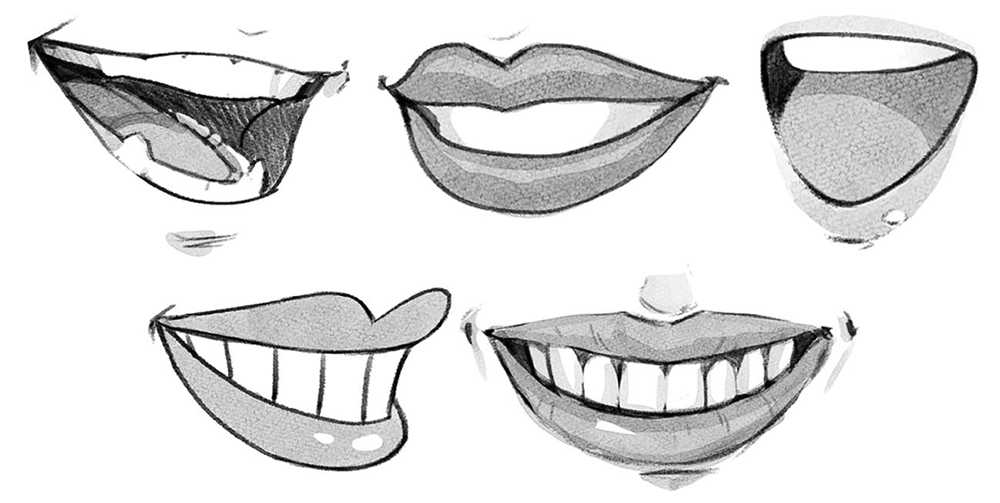
7. Expressions and emotions through lips and mouths
There are many important elements on a face that help define expressions. Together with other elements such as the eyes, eyebrows, the mouth and lips are key elements that build different expressions,
Take into account which areas of the mouth must be modified to represent one expression or another; to convey joy, the corners rise, to convey sadness, we draw them lower than usual. To convey anger, we show an open mouth (screaming) complete with teeth and gums.
The lips can help transmit different expressions and emotions: challenging, fearful, sensual, etc. The next image shows some examples of expressive mouths and lips:
8. Different styles to draw mouths and lips
Once we know the basics, it is time to draw them in different styles to see which one we feel the most comfortable with. In the following image, I wanted to show manga, realistic, cartoon, Disney, and my own style.
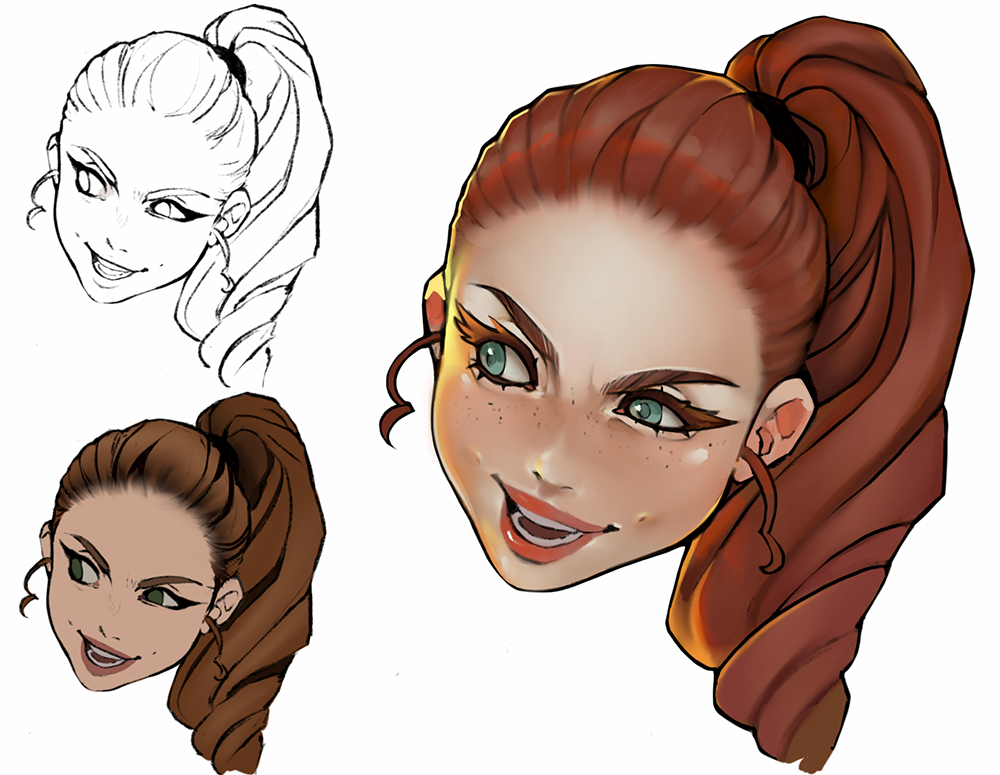
9. Mouth and lips integrated into an illustration
Finally, I would like to show the process of drawing a face from sketch to the final color. I wanted to create a slight expression and keep the image dynamic while trying to get out of my comfort zone. It is fun and beneficial to design characters with exaggerated and/or marked expressions.
Character Head Drawing Bottom View
Source: https://www.clipstudio.net/how-to-draw/archives/161618
0 Response to "Character Head Drawing Bottom View"
Post a Comment